
7 Things You Didn't Know PowerPoint Could Do That Will Make Your Next Presentation POP!

Let me guess…
You think PowerPoint dooms you to create #DeathByPowerpoint.
I mean, it is in the name right? So, it has to be true.
Or, maybe you feel like there’s not much more to learn about PowerPoint.
I mean, you’ve been using PowerPoint for decades, so what could possibly surprise you at this point, right?
Either way, in this post I hope to show you that you can create awesome presentations using PowerPoint and that there are probably some great features you don’t know about even if you’ve been using PowerPoint for decades.
Just in case you’re new to my blog, hi I’m Dr. Echo Rivera. I help academics, researchers, scientists, evaluators and similar professionals create engaging presentations. I provide professional development training for groups and individuals.
And in this blog we’ll be talking about 7 things you probably didn’t know PowerPoint can do that will make your next presentation pop!
Oh! I also made a video version of this blog post too, so you can see all these features in action :)
I’m going to show you more than 7 Powerpoint features, but I’ve broken them down into 7 categories.
Here are those seven categories:
Accessibility
Photo Editing
Interactivity
Animations
Custom Visuals
Data Visualization
Saving Time
Before we get started, I want to make sure you know about my FREE training workshop on engaging presentations >>
1. Accessibility in PowerPoint
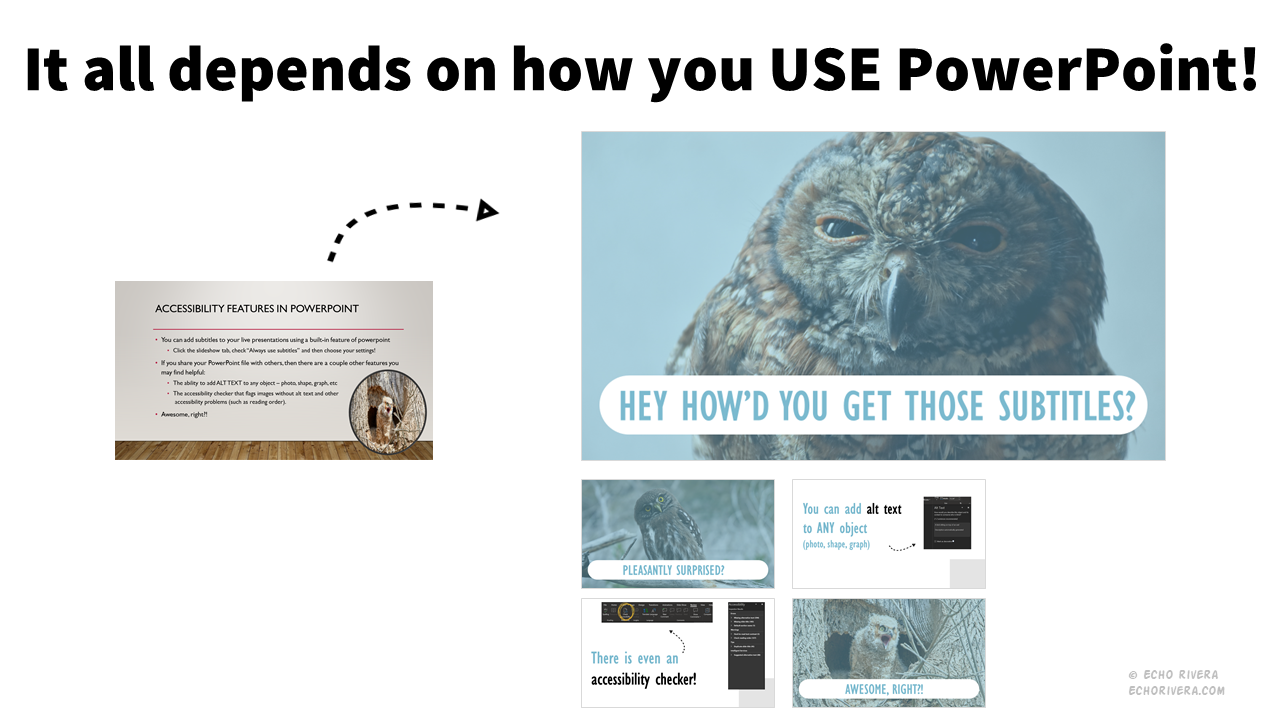
Feature #1: Live subtitles
Have you been trying to make your talks or lectures more accessible, but have been struggling with the captioning part—especially for live lectures?
Well, PowerPoint has live subtitles you can activate when giving a presentation.
How to activate subtitles in PowerPoint:
Click the “Slideshow” tab
Check “Always use subtitles”
Choose settings for your microphone and languages
Click into Presenter view and give your presentation
Want to see how accurate the PowerPoint subtitles are?
I test the subtitles (and talk about some pros/cons) in another video. I also had them activated in the video that goes with this post.
This feature is great and I’ve used it a lot—it’s kinda like having Rev.com built into PowerPoint!
Though, in full disclosure, I’m now using the live transcript feature in Zoom instead because then it works when I’m not sharing my PowerPoint slides. I also like that people can deactivate them if they don’t want to see the captions.
But, if you’re presenting in-person, then the PowerPoint live subtitles is a decent backup option to consider.
To learn more about which versions of PowerPoint have this feature, and how to activate them if the above instructions don’t work, visit the Microsoft page about the subtitles feature.
Feature #2: Alt Text
Do you need to share your PowerPoint file with someone who uses a screen reader due to a vision disability?
If so, then you’ll need to add Alt Text to all of your images, graphs, and slide objects. That way, the screen reader will know what to say for those.
How to add Alt Text to images in PowerPoint:
Right click on the object, image, or graph
Click “Edit Alt text”
Add the text you want a screen reader to say
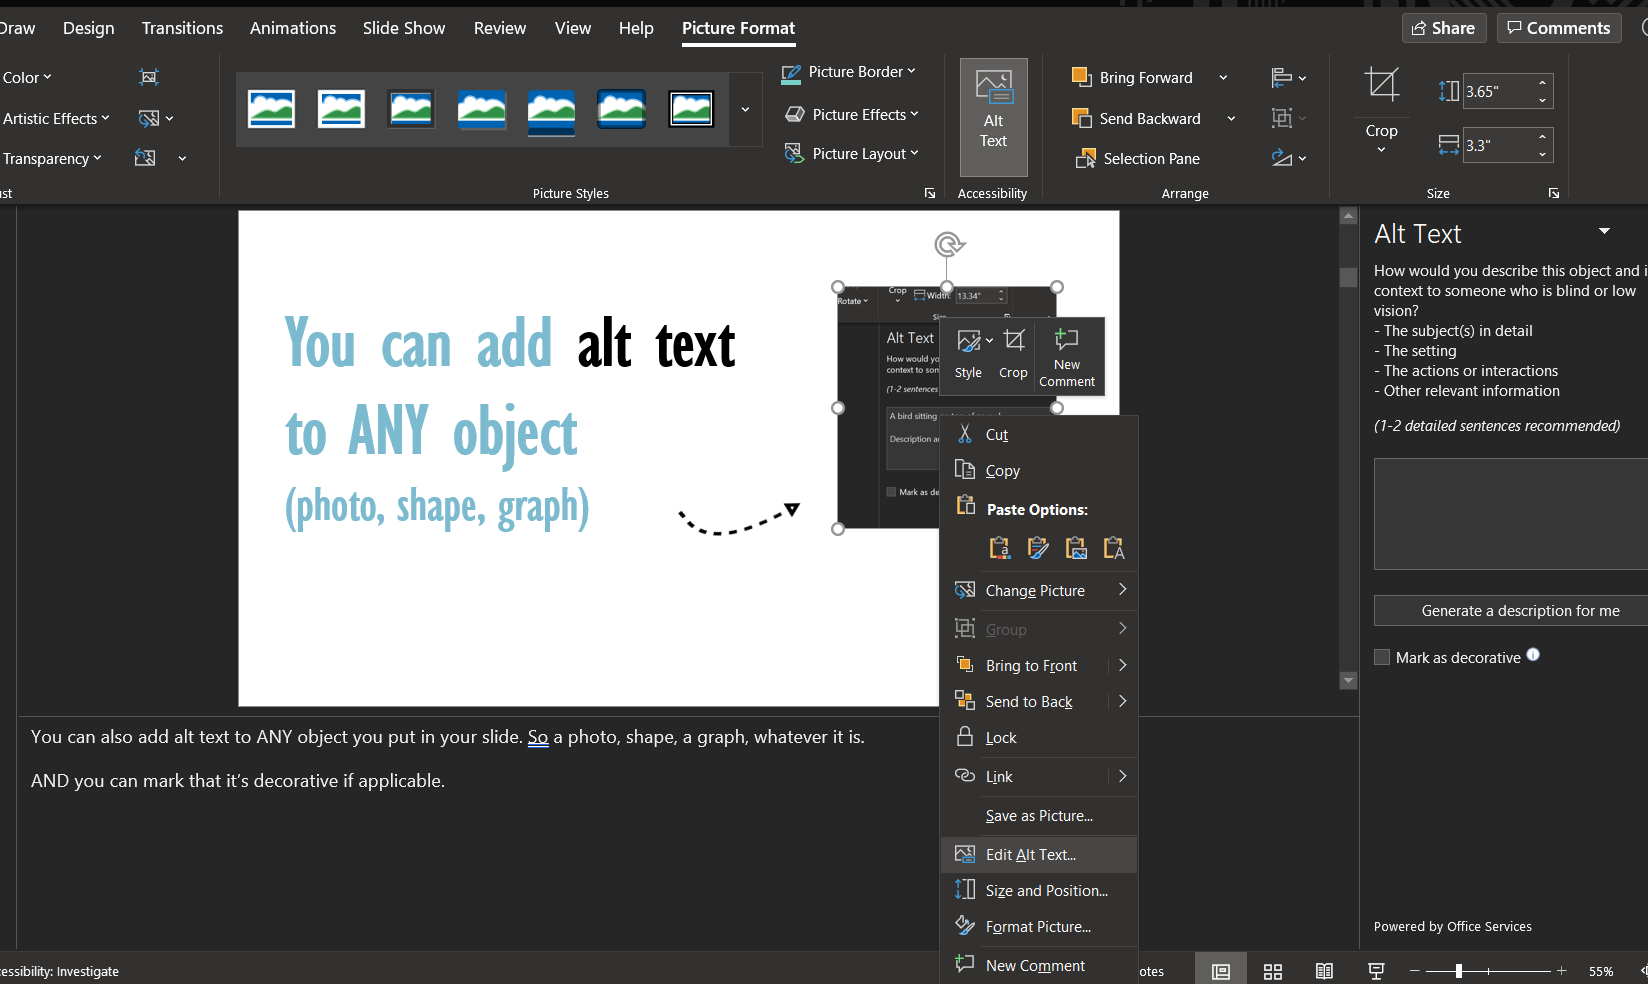
If you have an object on your slide that does not need to be spoken to the person, then you check “mark as decorative” instead of typing a description.
But, your slides shouldn’t have those types of things on them and if you find that you have a lot of decorations on your slides, then be sure to check out my free training ASAP.
To learn more about which versions of PowerPoint have this feature, and how to activate them if the above instructions don’t work, visit the Microsoft page about the Alt Text feature.
Feature #3: Accessibility Checker
If you’re sharing a PowerPoint file so someone can use a screen reader with it, then you’ll need to do more than just add alt text to your images.
You also need to:
make sure the order of the information is correct
none of your tables have merged cells
add slide titles
The PowerPoint Accessibility Checker can help you find slides that make mistakes in these areas.
Beyond helping those who use a screen reader, this feature will also flag slides that don’t have enough contrast.
To learn more about which versions of PowerPoint have this feature, and how to activate them if the above instructions don’t work, visit the Microsoft page about the Accessibility Checker feature.
2. Photo Editing in PowerPoint
Have you seen PowerPoint slides that look like this?
Yeah, me too.
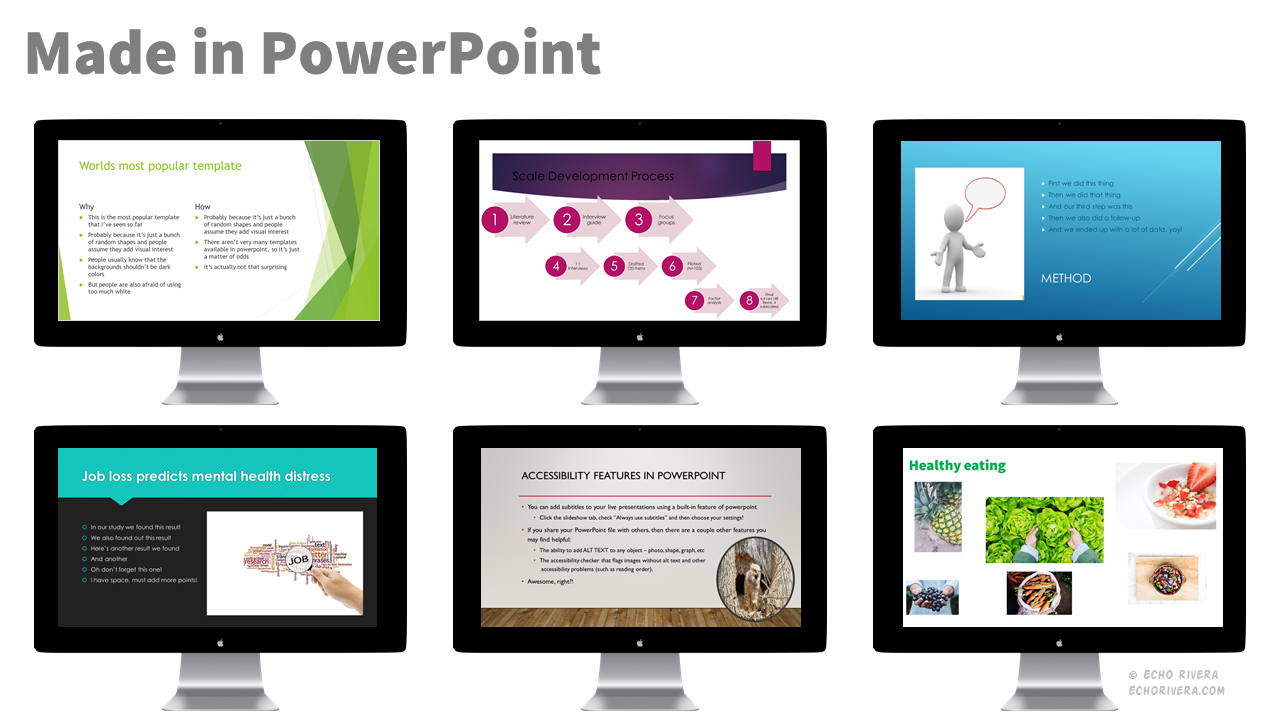
But there is nothing in PowerPoint that forces anyone to create slides like that.
In fact, these slides were made in PowerPoint, too!

For example, I could present accessibility information about PowerPoint using a template, wall of text, and a poorly-formatted visual…
…or I could also present accessibility information about PowerPoint using my own slide, minimal text, and well-formatted visuals.
PowerPoint has fantastic built-in tools that make it easy for you to create highly visual slides.
Feature #1: Built-in icons, photos, and illustrations
PowerPoint has built-in icons, photos, and illustrations that I highly recommend you use. Unlike PowerPoint SmartArt, these are actually modern and will help improve your presentation design.

How to use the PowerPoint icons, photos, and illustrations:
Click the “Insert” tab
Click on “Icons”
Choose the tab you want to search in (Images, icons, cutout people, stickers, videos, or illustrations)
Choose which one/s you want to add and click “Add” or “Insert”
If you don’t see the photos and illustrations, they might be somewhere else. Try this:
Click on the “Insert” tab
Click on “Pictures”
Click “stock images”
This is a relatively new feature in PowerPoint, so you do need a recent version. But this feature alone would make an upgrade worth it, in my opinion.
If you ever feel like it “takes too long” to create visual presentations, then this is the #1 feature that will make it both easier and faster for you to create better slides.
To learn more about which versions of PowerPoint have this feature, and how to activate them if the above instructions don’t work, visit the Microsoft page about the icons feature.
Some people don’t see the illustrations or cutout people with the icons. If that’s you, then try this:
Feature #2: Crop
Have you ever struggled to get a photo to fit the space you need it to you on your slide?
Do you end up with distorted images because you’re trying to make a photo fit?
There’s one solution for both challenges: crop!

You can do a basic crop, where you just trim the edges of a photo.
How to do a basic crop in PowerPoint:
Double click the photo (or click on the photo, then click the “Photo” tab)
Look to the top right for where it says “crop” and click on it
Little black bars will pop up on your image—use those to trim the photo
Hit the enter key or click out of the image to finish cropping
Note: for some Mac users, when you double click on the photo, it automatically takes you to the cropping mode, so you can sometimes skip step 2.
If you want to adjust how you cropped the photo, all you have to do is repeat the steps above.
All versions of PowerPoint have this feature. To learn more and/or see how to do it if the above instructions don’t work, visit the Microsoft page about the Crop feature.
You can do more than a basic crop, though. You can get fancy and crop your photo into a shape, too!
How to crop a photo into a shape in PowerPoint:
Double click the photo (or click on the photo, then click the “Photo” tab)
Look to the top right for where it says “crop”
Click on the down arrow by the icon
Hover over “crop to shape”
Choose your shape
Little black bars will pop up on your image—use those to trim the photo and adjust into the shape
Hit the enter key or click out of the image to finish cropping
All versions of PowerPoint have this feature. To learn more and/or see how to do it if the above instructions don’t work, visit the Microsoft page about the Crop into Shapes feature.
Feature #3: Edit Photos and Add Filters
I highly recommend you use your own photos as much as possible in your presentations.
The problem with photos we take, though, is that they don’t always look very good.
Luckily, PowerPoint has some basic photo editing and filter options that can help.

How to edit photos and add filters in PowerPoint:
Double click the photo (or click on the photo, then click the “Photo” tab)
Look to the left for where it says “corrections” or “color” or “artistic effects”
Choose one and play around with the settings until you like the way the photo looks.
To learn more about which versions of PowerPoint have this feature, and how to activate them if the above instructions don’t work, visit the Microsoft page about the Picture Corrections Pane feature.
Feature #4: Remove Background
If you really want to take your creativity to the next level, then playing around with removing backgrounds is a must-know feature.

How to remove photo backgrounds in PowerPoint:
Double click the photo (or click on the photo, then click the “Photo” tab)
Look to the left for where it says “remove background” and click.
Some of the image will be a bright pink — that’s what PowerPoint will remove. Use the “mark areas to keep” and “mark areas to remove” until it’s how you want.
Click the checkmark for “Keep all changes” when you’re done.
I’ll be honest: it can be a little annoying to use.
When you mark an area to keep or remove, it will often change another part of the image. I often find myself having to repeat what I mark over and over again.
Apple Keynote has a background removal feature that is better and easier to use, so if you use a Mac and have Keynote, consider using that to remove backgrounds instead.
And, obviously, it will never look as good as a photo that had the background removed using professional photo editing software.
But if all you have is Windows and you just need to do something quick and informal, this is a good option.
To learn more about which versions of PowerPoint have this feature, and how to activate them if the above instructions don’t work, visit the Microsoft page about the background removal feature.
3. Interactive Features in PowerPoint
Feature #1: Non-linear presentations with PPT Zoom
Have you ever been to a presentation where the speaker just talked the whole time?
Yeah, me too.
The thing is—there’s nothing in PowerPoint that requires it.
There’s nothing in PowerPoint that stops the speaker from engaging with the audience.
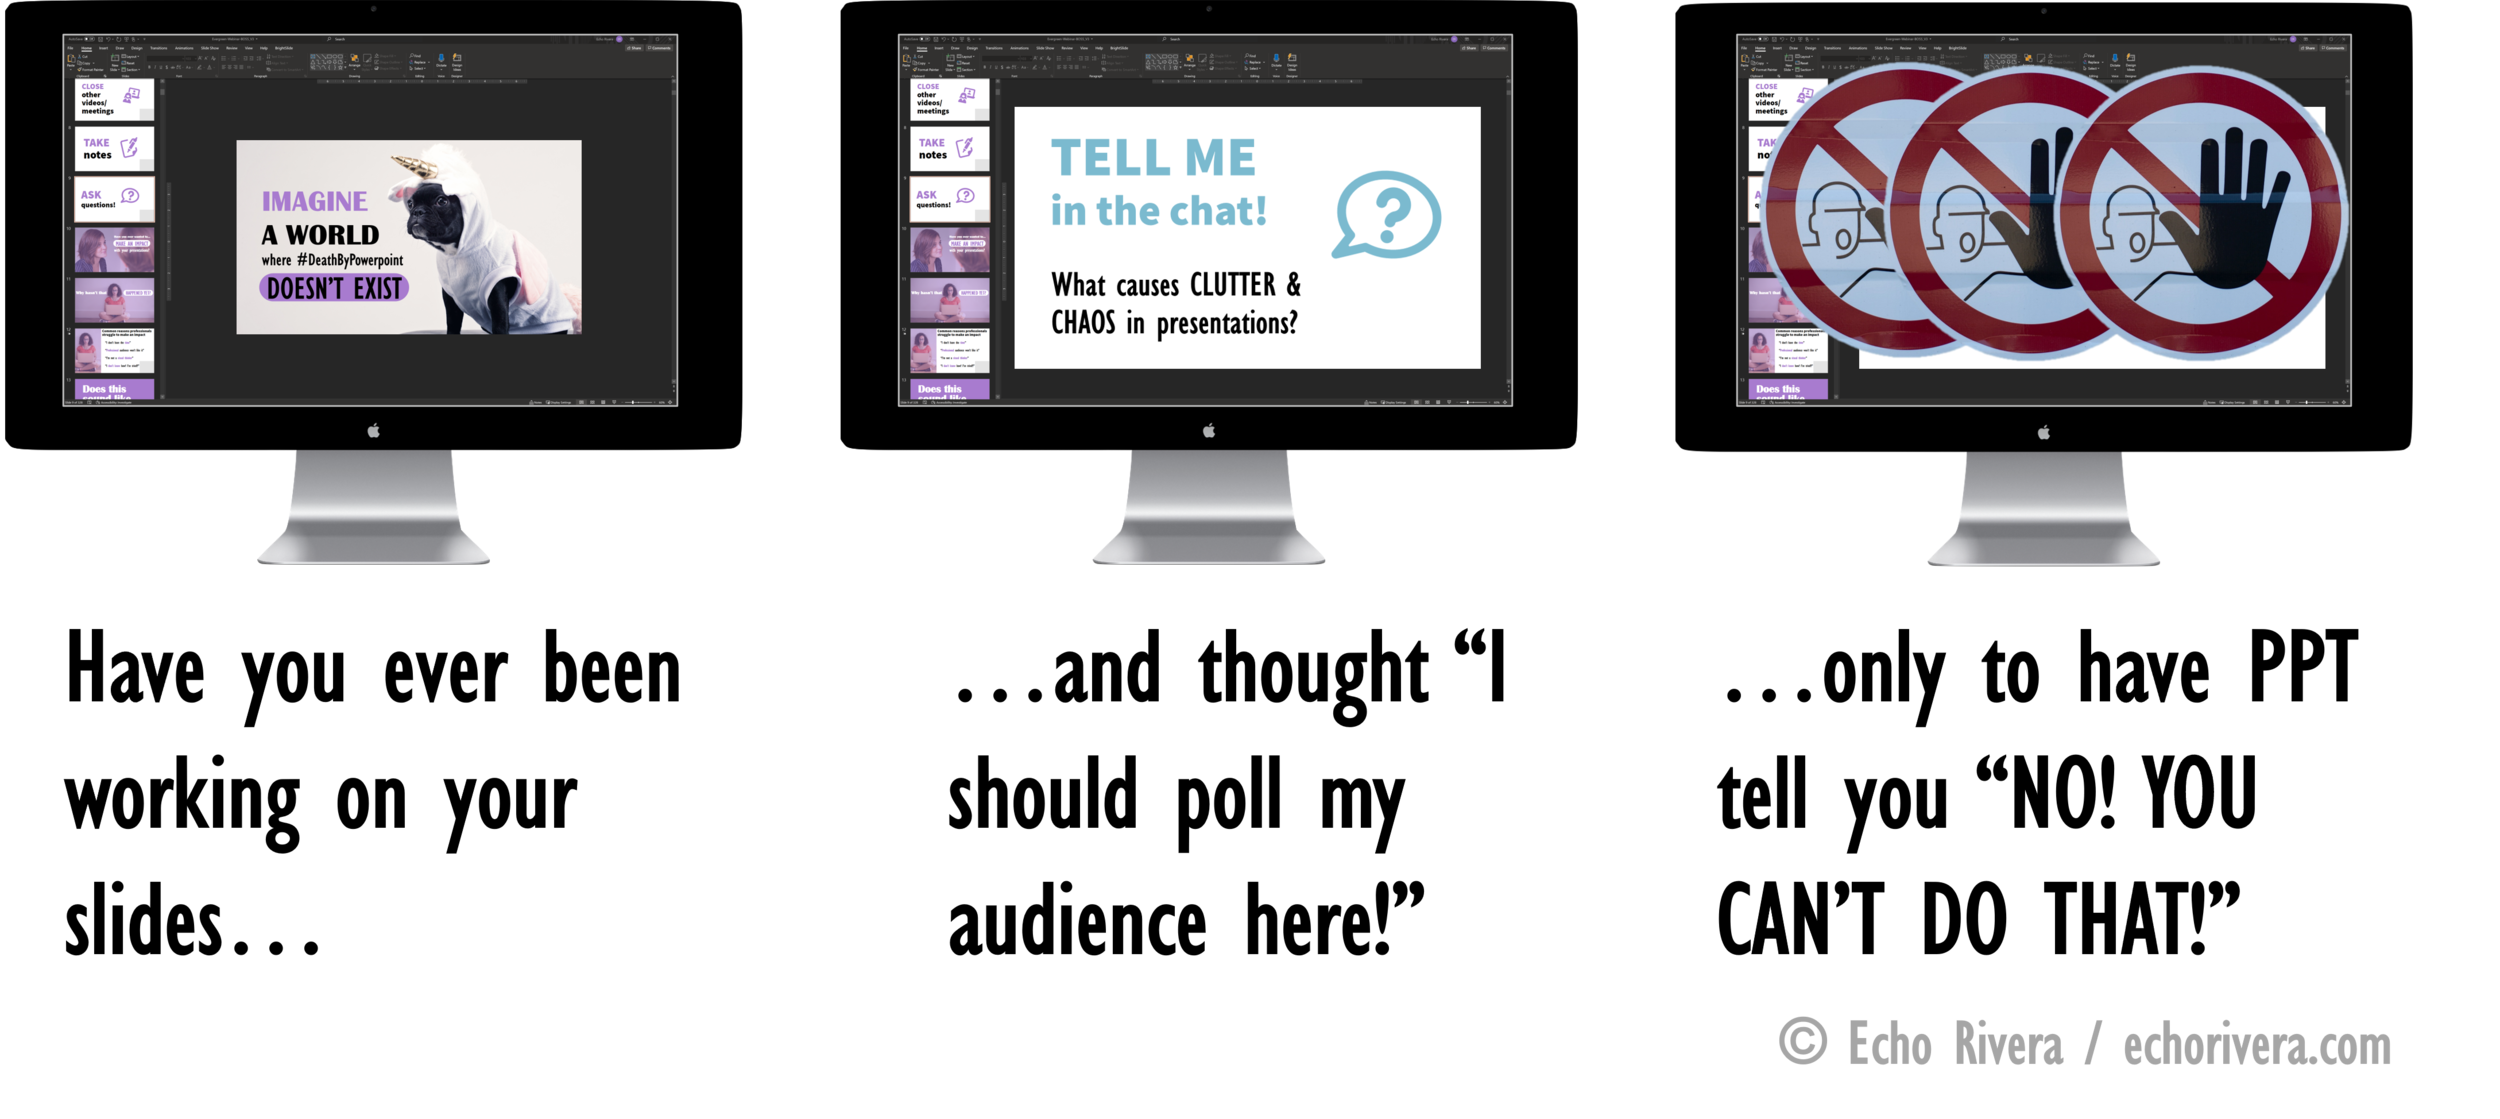
I mean, have you ever been working on your slides and thought, “oh! I should poll my audience here!” only to have PowerPoint tell you “No! You cannot do that!”
Nope. That’s not a thing that happens.
Talking at people is a choice that presenters make, and has nothing to do with PowerPoint’s features.
In fact, PowerPoint has a feature that encourages you to interact with your audience!
Remember Prezi?
It was all the rage for a few years back in the early 2000s.
I was an early adopter but stopped using it because it was a lot of work and a lot of money to make what was ultimately just a nice PowerPoint presentation.
There was one benefit of Prezi, though: interactive (“non-linear”) presentations.
What people liked about Prezi was the option to be able to go through the presentation out of order.
For example, if you have 4 categories of information you want to share with your audience and the order doesn’t matter, you could let the audience choose which category to start with.
That makes for a highly engaging presentation.
Well, the good news is that PowerPoint actually lets you do that. It’s called the “Zoom” feature (not to be confused with the meeting/webinar app!) and is really easy to set up.
I made a video about the Zoom feature, and in it I show you an example of what this could look like in a real presentation.
How to create an interactive, non-linear presentation in PowerPoint:
Create sections in your presentation for each chunk of slides that will be part of the non-linear presentation.
Create a new slide that will work as your “table of contents”.
Insert > Zoom > Section Zoom.
Click on the sections to include, then click insert.
Arrange the thumbnails however you want.
Click on one of the thumbnails > click on the Zoom tab > UNCHECK “zoom transition” (that will make people nauseous!).
REPEAT #6 for all thumbnails.
To learn more about which versions of PowerPoint have this feature, and how to activate them if the above instructions don’t work, visit the Microsoft page about the Zoom feature.
4. Animations in PowerPoint
Animations and transitions in PowerPoint have a bad reputation.
There’s a reason for it: we’ve all seen presentations filled with wild, nonsense animations and transitions.
And, I do still see a lot of people use inappropriate animations and transitions all the time.

But like I’ve mentioned earlier, there is nothing in PowerPoint that requires you to use them.
You can pretend the bad animations don’t exist and just … not use them.
But here’s the thing: you should still use animations and transitions.
You just need to know which ones to use. It’s not an “all or nothing” thing here.
There are good animations and bad animations.
When you use good animations in the right way you can reduce or prevent cognitive overload for your audience.
One of the best animations that PowerPoint has is Ink Replay. With the draw tab and ink replay, you can draw in a slide and then animate it as if it were being drawn in the moment.
Look at how mind-blowingly awesome this looks:

So the next obvious question is: Which animations/transitions are good and which ones are bad?
That’s a nuanced answer, and is the benefit to taking some professional development on how to create engaging presentations.
For example, in my training, you learn a framework for how to present effectively so you can know how to answer that question depending on the specific presentation context (content, audience, delivery format).
If you’re enjoying this blog post so far and you want to learn how to use all these features the right way, then you’ll love my presentation training! You can get started for free with my free training.
How to add animations in PowerPoint (movement that happens within a single slide):
This is a pretty detailed and nuanced topic, but just to get you started:
Click on the object you want to animate.
Click the “animations” tab
Choose a good animation
Click on “Animation Pane” to make further adjustments
How to add transitions in PowerPoint (movement that happens between slides):
Again, this is a pretty detailed and nuanced topic, but just to get you started:
Click on second slide
Click the “transitions” tab
Choose a good transition
look to the right section if you want to make further adjustments
To learn more about which versions of PowerPoint have which animations/transitions, and how to use them if the above instructions don’t work, visit the Microsoft page about animations and the Microsoft page about transitions.
Just remember: you have to choose a good animation/transition and for the right reasons. Otherwise, you’ll just be adding extra work for yourself and overwhelming your audience.
By now, you’re probably wondering why should you spend the time to learn all of these features?
One reason is because this will make your basic, standard, everyday presentation significantly better.
But there’s another reason: Knowing how to use features like this is what will give your presentation that wow factor.
For example, instead of just showing a pie chart and a graphic…what if we applied some photo editing and animations to make it do something like this:

Cool, right?
And this can make slides with a graphic + text even more memorable.
Here’s the dog I showed earlier in the background removal example,
You wouldn’t do something like this for every single slide in a presentation—that would be too much. But this would be a powerful opening slide to hook the audience!

Here’s one more example where I used photo editing and animations to make a powerful, memorable slide.

Are you shocked at what PowerPoint can do?
I hope that you’re excited to see how creative you can actually be using software that’s underused.
5. Editing Shapes in PowerPoint
This is the feature that most people don’t know about: you can edit shapes in PowerPoint.
Your first reaction to that might be, “so what? why would I do that?”
So I’ll use an example of something we see in a lot of presentations: Venn diagrams.
Chances are you think you only have 2 options for creating a Venn diagram in PowerPoint:
Making shapes transparent and layering them, or
A PowerPoint SmartArt Venn diagram
As I explain in another post, both of those are wrong.
The right way to create Venn diagrams is to add two circles to the slide, overlap them, and then fragment them.
Here’s what that looks like:

That’s what allows you to customize each section of a Venn diagram.
Why would you want to do that?
So you can change the colors around and help your audience see exactly which slice you’re referring to. You can make it a unique color, or you can make all the other slices gray so that the slice you’re talking about is the only one with a pop of color.
See the difference here:

There are all sorts of options to play around with. You can merge shapes or use one shape to “cut out” a portion of another.
How to edit shapes in PowerPoint:
Overlap some shapes.
Select both.
Click the “Shape Format” tab
Look towards the left for a tiny icon that’s two circles overlapping. Click it.
Choose the option that best fits with what you need to do (I used “fragment” in the above example).
To learn more about which versions of PowerPoint have this feature, and how to activate them if the above instructions don’t work, visit the Microsoft page about the editing shapes feature.
6. Data Visualization in PowerPoint
We’ve all seen overwhelming and confusing quantitative and qualitative data presented via PowerPoint.

Well, just like before, there is nothing in PowerPoint that forces you to present data that way.
Here are some data visualizations I created using PowerPoint:
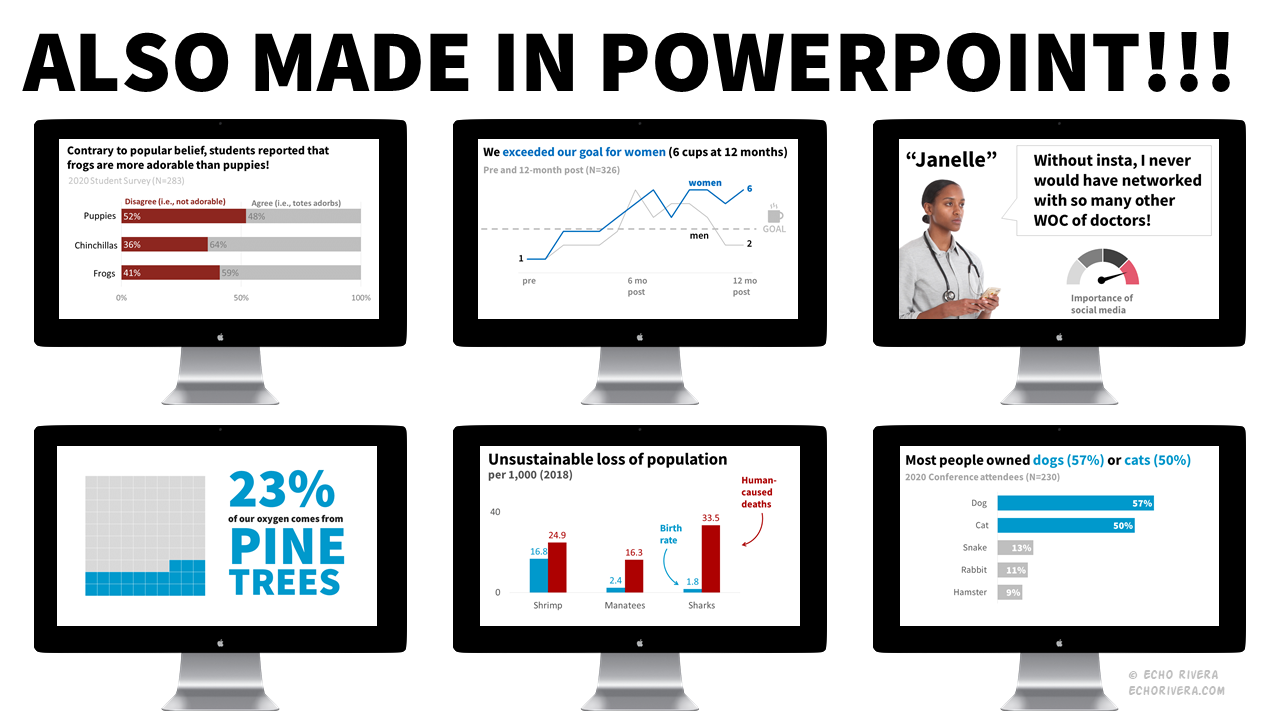
Data looks confusing and overwhelming in PowerPoint if it’s designed that way. Likewise, data will be engaging and easy to understand if it’s designed that way. You have full control over this as the presenter.

If you want to present data effectively using PowerPoint, you can. It involves knowing how to:
Choose your key points and figuring out the “story”
Choose what data to show, and what not to show
Organize your data so it’s clear and concise
Change the default settings so it’s well-designed
Hack settings when needed to achieve the look you want
Knowing how to use PowerPoint doesn’t teach you that, really. That’s the type of thing you learn through professional development about how to present effectively.
7. Saving Time in PowerPoint
Alright. Now that we’re on the last category, I know you’re thinking that all this stuff takes forever and you don’t have the time to do it.
So, I wanted to end by sharing the best news of all: PowerPoint has excellent built-in features that will speed up your design.
The time-saving features in PowerPoint are:
Using the icons, photos, and illustrations mentioned above
Customizing the Master Slides in your PowerPoint file
Editing and then saving defaults for your text boxes
Editing and then saving defaults for your shapes
Editing and then saving defaults for your graphs
That’s why I created a full 90-minute workshop that walks you through how to set up the Master Slides in PowerPoint and use these settings to save you time.
The workshop is included in my signature program, Blast Off to Stellar Slides! Get started for free and learn more about my program here: